diy wooden shoe rack for entryway easy build is really about one thing: getting shoes off the floor without turning your entry into a half-finished woodworking project. If your hallway feels cramped, or you’re tired of tripping over sneakers, a compact rack you can build in an afternoon usually beats another flimsy plastic organizer.
The nice part is you don’t need fancy joinery to make something solid, clean-looking, and easy to maintain. Most entryways benefit from a low rack that stays stable when kids kick shoes in, and that fits common shoe sizes without wasted space.
A common mistake is overbuilding: too tall, too deep, too many tiers, then it blocks the door swing or becomes a dust shelf. This guide keeps it practical, with a straightforward design, a quick sizing method, and a few upgrades if you want it to look more “furniture” than “garage.”
What makes an entryway shoe rack “easy build” (and still sturdy)
“Easy” usually means you can cut, screw, and sand with basic tools, and the rack stays square without complicated clamps. For entry use, strength comes more from good layout than from advanced joints.
- Simple geometry: rectangles with consistent shelf spacing, fewer angled cuts.
- Common lumber sizes: 1x3, 1x4, 1x6 boards, or plywood strips you can rip at the store.
- Screws in the right places: pre-drilled, countersunk, and not too close to board ends.
- Stable footprint: depth that resists tipping when someone drags a boot off.
According to Consumer Product Safety Commission (CPSC), tip-over incidents are a real household safety issue, especially around kids. A shoe rack is lower risk than a tall dresser, but if your rack is narrow or top-heavy, it’s still worth thinking about wall anchoring.
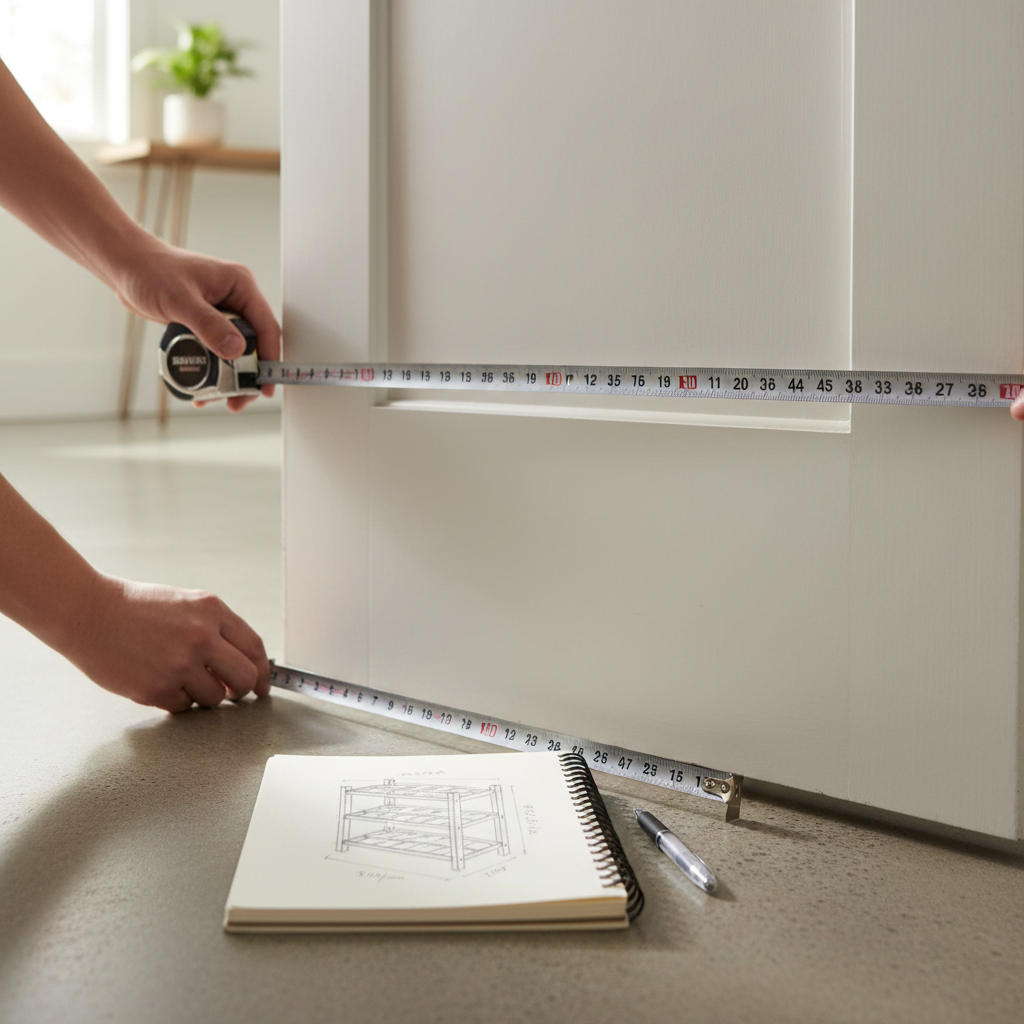
Pick the right size for your entry (a fast measuring method)
Before you buy wood, measure the space like you’re measuring for inconvenience: door swing, baseboards, and the path people actually walk. Many “it doesn’t fit” moments come from forgetting trim or vent covers.
- Width: wall-to-wall space minus 1–2 inches so it slides in easily.
- Depth: typically 10–12 inches works for most shoes, deeper if you store big boots.
- Height: 2 tiers for small spaces, 3 tiers if you have the wall length and want more capacity.
- Shelf spacing: about 6–7 inches for sneakers, 8–10 inches if boots are common.
If your household includes large men’s shoes, plan for a little extra depth and slightly wider shelf “lanes.” A rack that barely fits shoes tends to look messier than one that has breathing room.
Materials, tools, and cost notes (keep it realistic)
For a diy wooden shoe rack for entryway easy build, the most forgiving materials are pine boards or plywood with edge banding. Hardwood looks great but is less forgiving if you’re new, and it costs more.
Materials (typical)
- 1x4 or 1x3 boards for the frame (pine or poplar)
- 1x6 boards or 3/4-inch plywood for shelves
- 1 1/4-inch wood screws (or pocket-hole screws if using a jig)
- Wood glue (optional but helpful for stiffness)
- Sandpaper (120 and 220 grit)
- Finish: wipe-on poly, water-based poly, or paint + primer
- Felt pads or rubber feet (keeps it from skating on tile)
Tools (minimum)
- Measuring tape, pencil, speed square
- Drill/driver with bits
- Saw: miter saw, circular saw with guide, or store cuts
- Sander or sanding block
Cost varies by region and lumber quality, and stores sometimes charge for cuts. If you want the simplest weekend path, many big-box stores can cut boards to length, but you’ll still want to check for square ends at home.
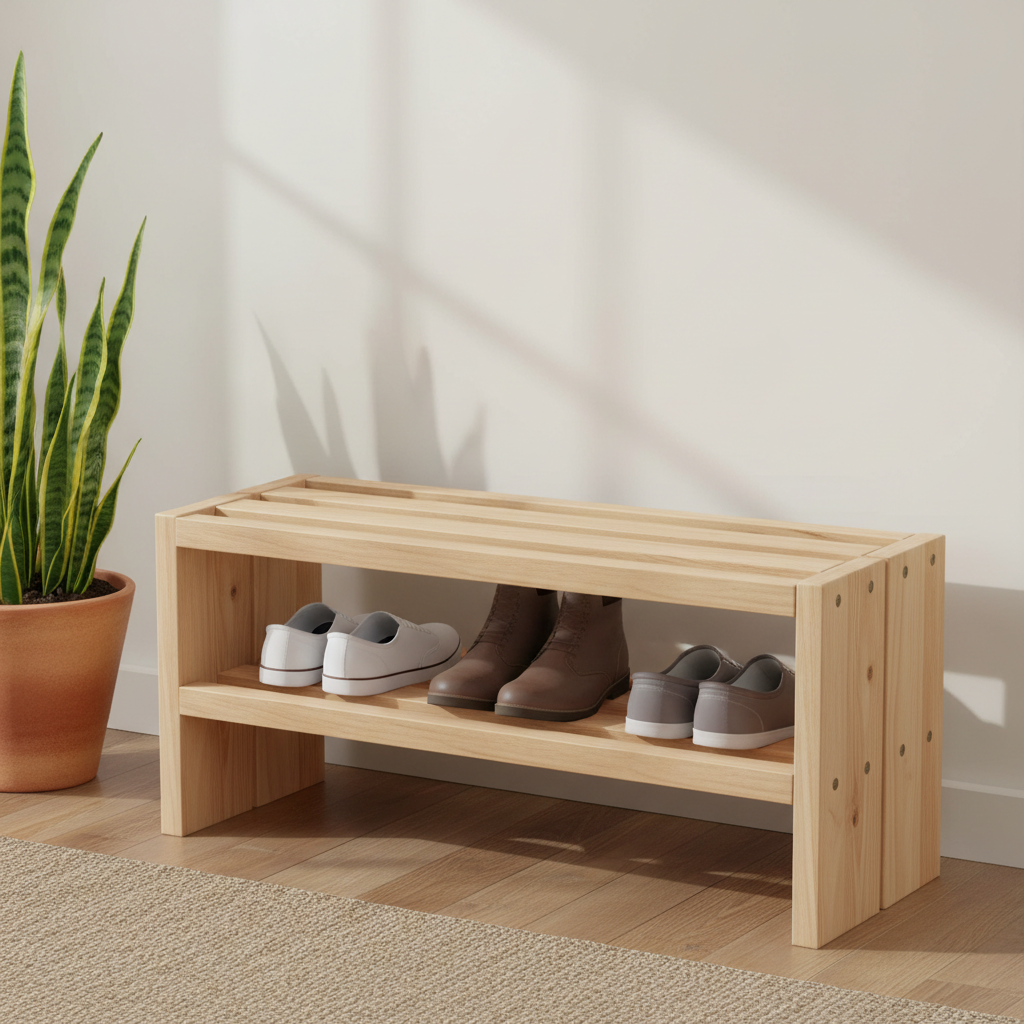
Build plan: a simple 2-tier rack you can finish in a weekend
This design uses two side frames, two shelves, and a few cross supports. It’s friendly to beginners because everything stays 90 degrees and the parts repeat.
Suggested dimensions (adjust to your space)
| Part | Qty | Example Size | Notes |
|---|---|---|---|
| Side legs | 4 | 18 in | 1x3 or 1x4 |
| Top/bottom side rails | 4 | 11 in | Matches rack depth |
| Front/back rails | 4 | 30 in | Matches rack width |
| Shelves | 2 | 30 x 11 in | 1x6 boards or plywood panel |
| Center supports | 2 | 11 in | Prevents shelf sag |
Step-by-step (kept simple on purpose)
- Cut and label parts. Put painter’s tape on pieces so you don’t flip rails by accident.
- Build two side frames. Each side is a rectangle: two legs + two short rails. Pre-drill to reduce splitting.
- Connect sides with front/back rails. Check for square by measuring corner-to-corner; adjust before tightening.
- Install shelves. Use screws from the rails into the shelf edges, or set shelves on cleats if you prefer.
- Add center supports under each shelf if your rack is wider than about 30–36 inches.
- Sand and finish. Start 120 grit, then 220 grit, then wipe clean before finish.
If you’re using pocket holes, they speed assembly and keep fasteners hidden. If not, countersink screws and use wood filler for a cleaner look, especially if the rack sits in a visible entry.
Quick self-check: what’s most likely to go wrong?
If this is your first time building entryway furniture, most “failures” aren’t dramatic, they’re small annoyances that make the rack wobble or look crooked. Run this checklist before you call it done.
- Wobble on the floor: legs not equal length, floor uneven, or frame racked out of square.
- Shelves sag: span too wide without a center brace, or thin shelf material.
- Splitting near screws: no pilot holes, screws too close to ends, or lumber too dry.
- Finish feels rough: dust between coats, skipping final sanding, or applying finish too thick.
Small fix, big payoff: if the floor is uneven, stick-on rubber feet or adjustable levelers can make a DIY rack feel like a store-bought piece.
Upgrades that make it look “built-in,” not “basic”
A diy wooden shoe rack for entryway easy build can still look polished if you choose one or two upgrades, not ten. The goal is visual calm in a high-traffic spot.
- Add a top bench board: turn it into a sit-to-put-on-shoes station, just reinforce with an extra rail.
- Use a toe-kick look: recess the bottom shelf slightly so shoes don’t look like they’re spilling out.
- Paint the frame, stain the shelves: contrast hides scuffs and reads more intentional.
- Label zones: one tier for daily shoes, one for guest shoes, it sounds simple but it reduces pileups.

If you have pets, consider a finish that cleans easily. Water-based polyurethane often handles scuffs and quick wipe-downs better than flat paint, though exact durability depends on prep and number of coats.
Safety, durability, and finishing tips people skip
Woodworking safety is mostly boring habits that prevent the bad day. According to OSHA, basic PPE and safe tool practices reduce the chance of injury on job sites, and the same principles apply in a garage shop.
- Pre-drill and countersink: reduces splitting and makes screw heads sit flush.
- Mind the door swing: leave space so the rack doesn’t become a dent-maker.
- Ventilation matters: finishes can off-gas, open windows or finish outdoors if possible.
- Wall anchor when in doubt: if the rack is tall, narrow, or sits where kids climb, anchoring is worth it.
If you’re unsure about anchoring into drywall versus studs, or you’re dealing with brick or plaster, it may be worth asking a local hardware pro or a handyman. It’s a small step that can prevent a bigger problem.
Key takeaways (keep these in front of you)
- Size comes first: measure door swing, trim, and walking path before buying lumber.
- Square beats fancy: a square frame and center support make the rack feel solid.
- Finish is function: entryway furniture needs wipeable, scuff-tolerant surfaces.
- Upgrade selectively: a bench top or a two-tone finish adds “furniture” vibe fast.
Conclusion: build the rack that ends the shoe pile for good
If you keep the design straightforward and build for your real entry dimensions, this project stays comfortably in the “easy build” category. Sketch your size, buy straight boards, and take the extra ten minutes to square the frame before you drive the last screws, that’s usually the difference between “homemade” and “nice.”
If you want a simple next step, measure your entry tonight and decide whether you need a 2-tier rack or a bench-style top, then make a cut list before you walk into the store, you’ll waste less time and come home with fewer wrong boards.
FAQ
How deep should a DIY shoe rack be for an entryway?
Many entryway racks work well around 10–12 inches deep, because it fits most sneakers without jutting into the walkway. If your household uses bulky boots, consider a bit more depth or a dedicated boot row.
What wood is best for a beginner-friendly shoe rack?
Pine and poplar are common picks because they’re easy to cut and sand. Plywood can also be beginner-friendly if you want flatter shelves, just plan for clean edges with edge banding or trim.
Do I need pocket holes to make it sturdy?
No, pocket holes are convenient, not required. Pre-drilled screws plus a simple frame can hold up well for shoes, and glue can add stiffness if your cuts are clean and clamps are available.
How do I keep the rack from wobbling on tile or hardwood?
Start by checking if the frame is square and all legs match length, then add felt pads or rubber feet. If the floor is uneven, adjustable levelers are a cleaner fix than shimming with cardboard.
Should I anchor an entryway shoe rack to the wall?
If the rack is tall, narrow, or sits where kids might pull on it, anchoring is a reasonable precaution. When in doubt, anchoring into studs is typically more secure, and you can ask a hardware store associate for the right fasteners.
What finish holds up best for muddy shoes and winter salt?
A durable clear coat such as water-based polyurethane is often easier to wipe down than flat paint, especially in winter. Drying time and odor vary by product, so follow the label and use ventilation.
Can I build this without a power saw?
It’s possible if the store cuts boards to length, and you use a drill/driver for assembly. Accuracy matters, so double-check measurements and ask for square cuts, then be prepared to sand edges at home.
How many pairs of shoes will a 2-tier rack hold?
It depends on the rack width and shoe sizes, but many 2-tier designs handle a small household’s daily rotation if you keep the spacing comfortable. If shoes still pile up, adding width often helps more than adding height.
If you’re building this for a tight hallway or you want it to match existing trim and finishes, it can be easier to start from your exact measurements and choose a finish schedule that fits your time, a quick sketch and a cut list review can save a lot of back-and-forth at the lumber aisle.