Rental friendly backsplash ideas for kitchen usually come down to one thing, you want the “wow” of a finished backsplash without losing your security deposit when move-out day hits.
The tricky part is that kitchens are messy zones, heat, steam, splatters, and constant wiping expose weak adhesives and cheap materials fast, so what works for a guest bathroom might fail behind a stove in week two.
This guide sorts options by real-life risk, how they install, how they come off, and what to watch for with landlords, paint, and textured walls, so you can pick something that looks intentional, not temporary.
What “rental-friendly” really means (and why it varies)
In a rental, “friendly” rarely means “no tools,” it means removable with minimal surface damage and easy to prove that you left the wall the way you found it.
Before you buy anything, assume three variables will change your outcome: wall texture, existing paint quality, and heat or moisture exposure. A product can be removable in one kitchen and a nightmare in another.
- Wall texture: Heavy orange peel and knockdown textures reduce contact area, adhesives may lift at edges.
- Paint condition: Older or budget paint can peel when you remove adhesive sheets.
- Heat zones: Behind a range needs higher heat tolerance than a sink run.
According to the U.S. Consumer Product Safety Commission, cooking is a leading context for home fires, so anything near open flame or high heat deserves extra caution and, in many cases, a more conservative choice.
Quick self-check: pick the right backsplash type in 3 minutes
If you want rental friendly backsplash ideas for kitchen that don’t turn into weekend regret, do this quick check before you click “add to cart.”
- Your wall is smooth and cleanable? Peel-and-stick tiles or panels often work well.
- Your wall is textured? Consider a panel system, a temporary “floating” backsplash, or a stick-on layer applied over a removable backing.
- You cook a lot (high splatter, high heat)? Prioritize wipeable, heat-rated surfaces and avoid placing adhesives too close to burners.
- You expect to move within 12 months? Favor solutions with easier removal, like vinyl panels, beadboard sheets, or removable wallpaper rated for kitchens.
- Your landlord is strict? Get permission in writing, even a short email is better than a verbal “sure.”
Top rental-friendly backsplash options (pros, cons, best use)
Here are the options that tend to hold up best in real rental kitchens, with the “gotchas” called out, because that’s where most plans fail.
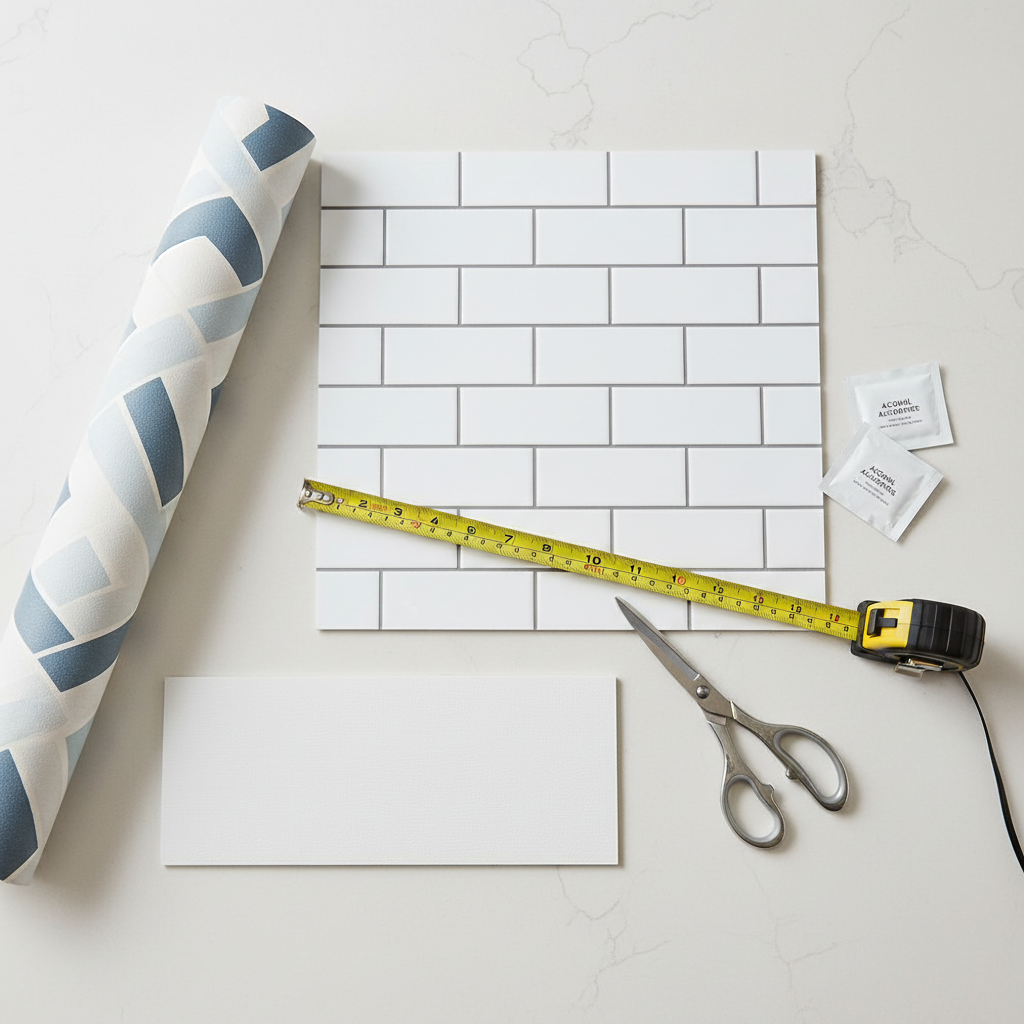
Peel-and-stick tiles (vinyl or gel)
These are popular because they look close to real tile from a few feet away and install fast. The downside is edge lifting if the wall is textured or greasy.
- Best for: Smooth walls, low to medium splatter zones, quick upgrades
- Watch for: Heat rating behind stoves, adhesive strength on older paint
Peel-and-stick wallpaper (kitchen-rated)
Wallpaper can look surprisingly high-end, especially patterns that mimic zellige, marble, or linen. In practice, seams and corners need patience so they don’t catch moisture.
- Best for: Large backsplash runs without many outlets, style-forward looks
- Watch for: Water exposure behind sink, cleaning products that can dull print
Removable panels (PVC, vinyl, lightweight laminate)
Panels cover more area with fewer seams, which often makes them easier to wipe. Many renters use thin panels with removable adhesive strips, keeping actual wall contact limited.
- Best for: Textured walls, faster cleaning, modern slab looks
- Watch for: Cutting accuracy around outlets and corners
Beadboard or thin wood sheets (painted, then mounted temporarily)
This can feel more “built-in” than stickers. If you paint the board off-site and mount with removable strips, you reduce risk to drywall.
- Best for: Cottage, traditional kitchens, renters who want depth and trim detail
- Watch for: Moisture swelling if edges are not sealed
Comparison table: cost, difficulty, removal risk
If you’re torn between a few rental friendly backsplash ideas for kitchen, this quick table helps narrow it down. Costs vary by brand and region, so treat ranges as directional.
| Option | Typical DIY difficulty | Cleanup & wipeability | Removal risk to paint | Where it works best |
|---|---|---|---|---|
| Peel-and-stick tiles | Easy to medium | Good | Medium | Smooth walls, standard backsplash runs |
| Peel-and-stick wallpaper | Medium | Medium | Low to medium | Low-splash areas, decorative impact |
| Removable panels | Medium | Very good | Low | Textured walls, behind sinks (if sealed) |
| Beadboard / thin wood sheets | Medium to advanced | Good (when sealed) | Low | “Built-in” look, longer stays |
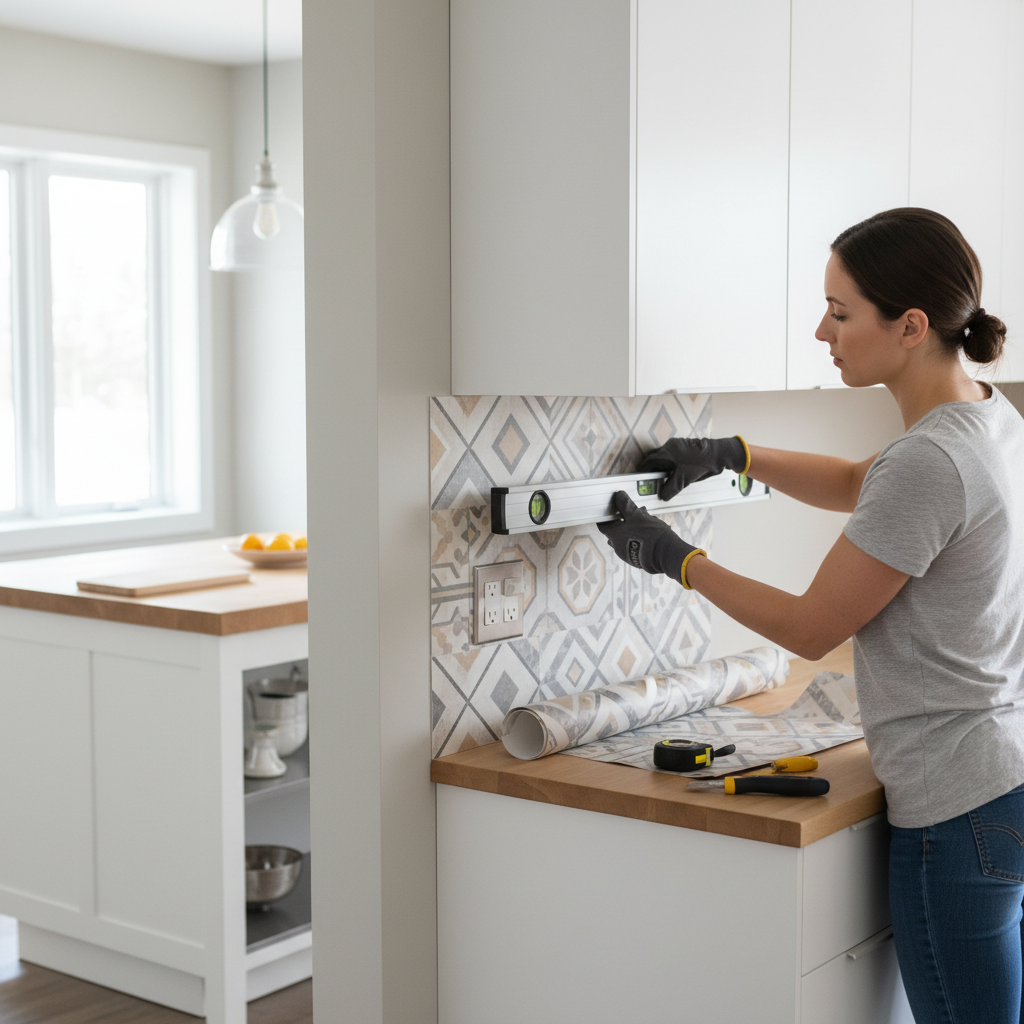
Installation steps that prevent peeling, bubbles, and crooked lines
Most failures come from prep, not the product. The wall looks clean, but cooking residue leaves a thin film that makes adhesives give up early.
- Degrease first: Use a gentle degreaser, then wipe with clean water and let it dry fully.
- Do a small test patch: Place a sample behind an appliance for 72 hours, then remove it slowly to see if paint lifts.
- Map your layout: Dry-fit sheets, mark a level line, and plan where seams will land so they avoid focal spots.
- Handle outlets carefully: Turn off power at the breaker if you remove outlet covers, if you are unsure, ask a licensed electrician.
- Press and seal edges: Use a soft roller or squeegee, pay extra attention to corners and near the sink.
Key point: If the wall has texture, you may get better results by mounting panels with removable strips, rather than relying on full-surface adhesive contact.
Safe placement near stoves and sinks (what to avoid)
Renters often ask if peel-and-stick works behind the range. Sometimes yes, but it depends on the stove type, how close the backsplash is to burners, and the product’s heat rating.
- Avoid direct heat exposure: Don’t place adhesive materials right next to open flame or where hot air vents constantly hit.
- Use a more durable center zone: If you want the look behind a stove, consider a removable panel that sits slightly off the wall or uses limited adhesive points.
- Seal sink edges: Water sneaking behind seams is what causes peeling and mildew smells, a thin removable caulk line may help, but check lease terms.
According to the National Fire Protection Association (NFPA), cooking equipment is a common source of home cooking fires, so choosing heat-appropriate materials and maintaining clearance is a practical safety move, not just “being picky.”
Removal and move-out tips (keep your deposit drama low)
Plan removal the day you install, because the safest removal method often depends on how adhesives age and how paint bonds to drywall.
- Warm it slightly: A hair dryer on low can soften adhesive, keep it moving, don’t overheat one spot.
- Peel slowly at a low angle: Pulling straight out increases paint lift risk.
- Use adhesive remover carefully: Test in a hidden spot first, some removers can discolor paint.
- Patch small paint pulls: If tiny chips happen, spackle and touch-up paint often fixes it, match sheen as closely as you can.
If you’re dealing with older plaster, questionable paint layers, or you see drywall paper tearing, it may be worth asking a handyman or painter for help, that’s usually cheaper than a deduction plus your time stress.
Common mistakes that make “temporary” upgrades look temporary
You can spend very little and still make it look clean, but a few habits almost always give away a rushed job.
- Skipping outlet planning: Crooked cuts around outlets pull attention immediately.
- Starting without a level line: Counters are not always level, your backsplash should be.
- Busy pattern, busy countertop: If your counters already have movement, choose a quieter backsplash print.
- Over-cleaning with harsh chemicals: Some glossy films haze, use mild soap and a soft cloth.
Key takeaway: The more “seams” you create, the more chances for lifting, choose larger panels or smarter seam placement if you want less maintenance.
Conclusion: choose the least risky option for your wall, not the trendiest one
Rental friendly backsplash ideas for kitchen work best when you match the material to your wall condition, cooking habits, and how strict your lease is, not when you chase the most popular before-and-after photo.
If you only do two things, do a 72-hour test patch and plan your layout around outlets and seams, those steps save more frustration than any “premium” tile sheet. If you want a cleaner look this week, pick one small area first, like the coffee station wall, get a win, then expand.