How to create a gallery wall without nails comes down to two things: choosing the right wall-safe hanging method and planning the layout so you don’t keep re-sticking (and re-peeling) strips.
If you rent, have plaster walls, or just don’t want patch-and-paint projects, nail-free hanging can feel like a compromise. The good news is it usually isn’t, as long as you match the product to your frame weight and your wall finish.
There are a few common myths that trip people up, like “all adhesive strips work on all paint” or “command strips fail randomly.” In reality, most failures come from surface prep, weight misreads, or rushing the cure time. This guide walks you through a practical, low-stress setup that looks intentional, not improvised.
Pick the right nail-free hanging method (and when each works)
Before you measure anything, decide what you’re hanging and what your wall is. Different walls behave differently, glossy enamel paint is not the same as matte, and textured walls can reduce adhesive contact.
Here’s a quick comparison table you can use to choose a method without overthinking it.
| Method | Best for | Watch-outs | Removal |
|---|---|---|---|
| Adhesive picture hanging strips | Most framed art, small-to-medium galleries | Needs clean, dry surface; texture can reduce hold | Usually clean if removed correctly |
| Adhesive hooks | Frames with wire, lightweight decor | Hook depth may push frames off wall | Usually clean if removed correctly |
| Poster putty / museum putty | Light prints, small frames, stabilizing corners | May stain porous paint; heat can soften | Can leave residue, test first |
| Picture ledge / shelf (wall-mounted) | Swap art often, layered look | Often requires anchors/screws, not truly nail-free | Depends on install |
| Tension rod + clip system | Window-adjacent displays, lightweight prints | Limited placement; style-specific | Easy |
According to 3M (maker of Command products), following the weight limits, cleaning the surface, and pressing firmly for the recommended time are key to getting reliable hold and clean removal. That’s not marketing fluff, it’s usually the difference between “works for years” and “falls at 2 a.m.”
Know your wall and your frames before you commit
Most gallery wall headaches start with “I thought it was lightweight.” Take five minutes to check your wall finish and frame build.
Fast wall check
- Paint sheen: satin/semi-gloss often holds adhesive better than chalky flat paint, but removal can still pull weak paint.
- Texture: orange peel or heavy texture reduces contact area, you may need more strips or a different approach.
- Fresh paint: if the wall was painted recently, adhesives may not bond well and can lift paint. Many manufacturers recommend waiting before applying adhesives, and if you’re unsure, check the specific product guidance.
Frame check
- Weight: weigh the frame if possible, don’t guess. Kitchen scales often work for smaller pieces.
- Backing: glass adds weight and momentum if it shifts, acrylic tends to be lighter.
- Hanging hardware: sawtooth hangers sit flatter; wire hangers can pull forward and need a hook-style solution.

A quick self-check: are you a good candidate for a no-nail gallery wall?
This isn’t about gatekeeping, it’s about avoiding the setups that almost always end with frustration.
- You’re hanging mostly small to medium frames, not oversized mirrors or heavy canvases.
- Your wall is painted drywall in decent condition, not crumbling plaster or flaky paint.
- You can keep frames fairly flat to the wall (wire-hung frames can work, but need more care).
- You’re willing to do surface prep and wait the recommended time before loading weight.
If you’re planning a very heavy arrangement, or you already know your paint chips when you remove tape, you may still do it nail-free, but you’ll want to reduce weight, use more contact points, or consider a rail/ledge approach.
Plan the layout first (the part people want to skip)
How to create a gallery wall without nails is much easier when your first placement is correct, because repeated repositioning can weaken adhesive and rough up paint. Planning saves your wall.
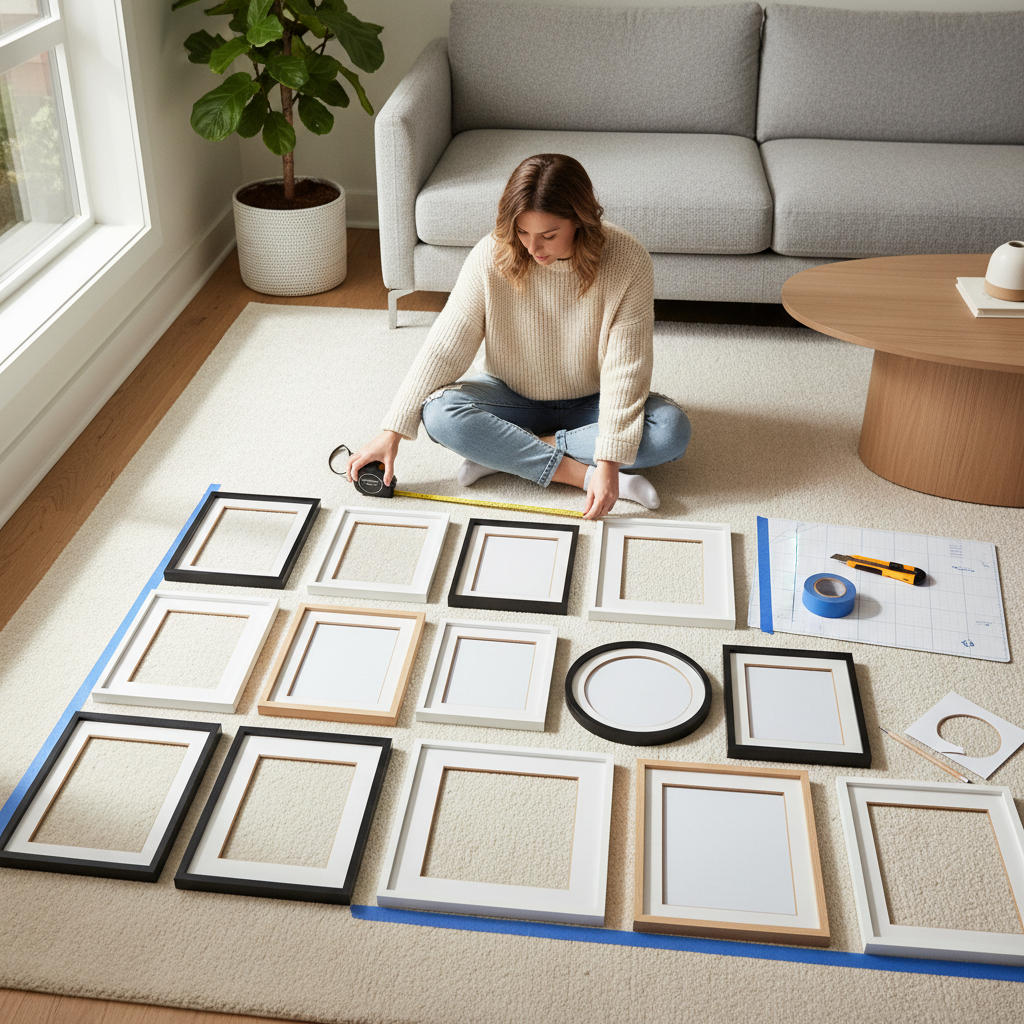
Two layout methods that stay renter-friendly
- Floor mock-up: arrange frames on the floor, take a photo, then replicate on the wall.
- Paper templates: trace each frame on kraft paper, cut it out, tape templates to the wall, then hang onto the template marks.
Spacing rules that look “designed” (not random)
- Keep gaps consistent: many people land around 2–3 inches between frames, but consistency matters more than the exact number.
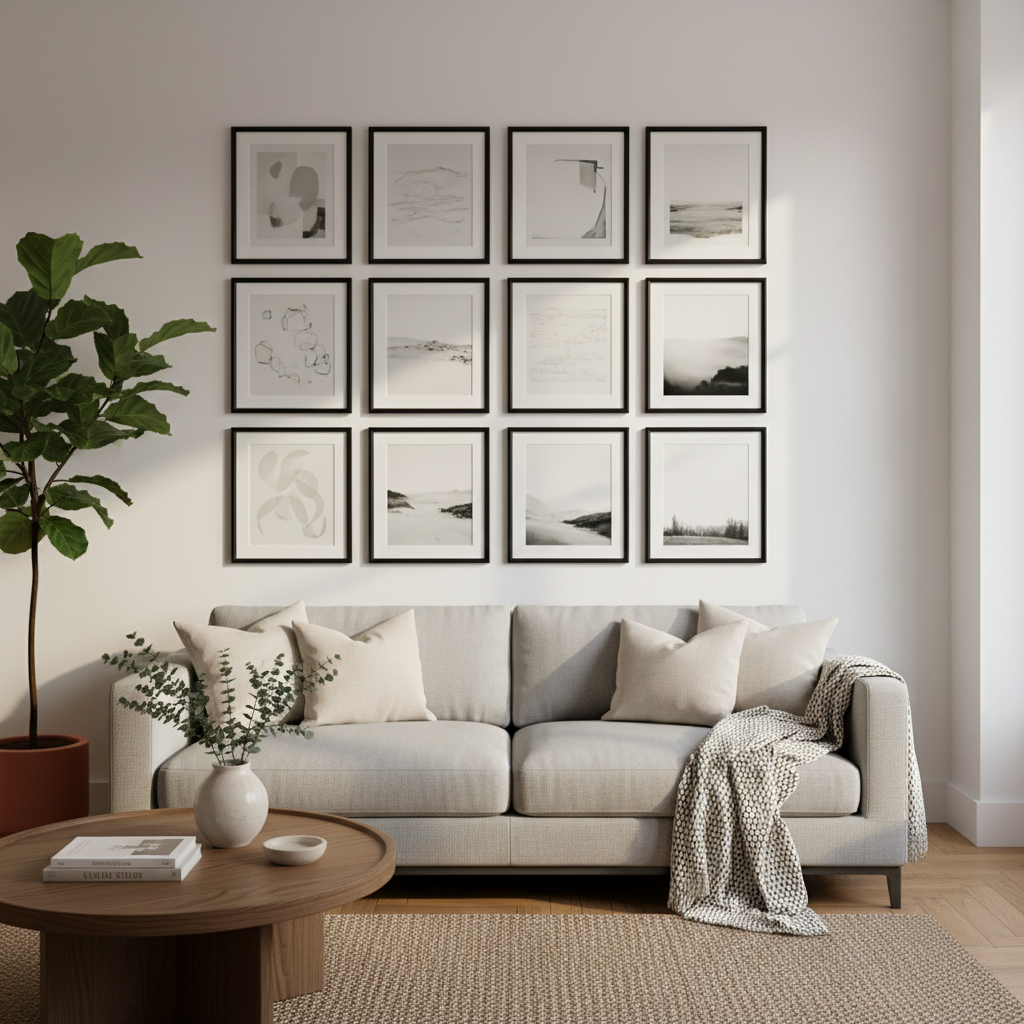
- Anchor with a centerline: pick one “hero” piece or a horizontal line, then build outward.
- Mind the furniture: if it’s above a sofa or console, the cluster usually looks better when it visually relates to that width.
Step-by-step: hang frames with adhesive strips (cleanly and level)
Below is the workflow that tends to minimize re-dos. Read it once, then start, it’s faster that way.
- Clean the wall: use a lint-free cloth and isopropyl alcohol where each strip will go, let it dry fully.
- Pair and place strips on the frame: apply strips to the frame first, press firmly across the strip surface.
- Mark your position: use your paper template or light pencil marks, then use a small level.
- Press on the wall with real pressure: press and hold as the product instructs, don’t do a quick pat.
- Respect cure time: many adhesive systems hold better after waiting, especially in humid rooms.
- Add anti-slide support: for frames that “walk” over time, a tiny dot of museum putty at bottom corners can stabilize without taking weight.
Key takeaway: Most “adhesive doesn’t work” stories are actually “adhesive didn’t get enough contact time on a clean surface,” or the frame was heavier than assumed.
Fix common problems (before they turn into wall damage)
You can usually salvage the situation without starting over, as long as you stop tugging on things while they’re half-attached.
If a frame keeps tilting forward
- Switch from a hook setup to strips that keep the frame flush.
- Add a second set of strips lower on the frame to reduce leverage.
- Check if the wire is too loose, sometimes tightening the wire helps.
If strips won’t stick
- Re-clean the wall spot with isopropyl alcohol, not household cleaner that can leave residue.
- Move slightly higher or lower, some areas have more dust or previous paint touch-ups.
- On heavy texture, use more strips to increase contact area, within manufacturer guidance.
If you’re worried about paint pull
- Test one strip behind furniture first, wait a day, then remove it correctly.
- When removing, pull the tab straight down, slowly, not out from the wall.
Safety, rentals, and when to ask for help
Even “damage-free” products can cause issues on weak paint, humid bathrooms, or very heavy items. If you’re hanging anything that could injure someone if it fell, be conservative with weight, placement, and method.
- Avoid placing heavy frames over beds or cribs in many situations, or consider a more secure mounting method.
- If you have plaster, brick, or crumbling drywall, it may be worth asking a handyman or contractor what’s safest for that surface.
- If you’re in a rental, check your lease language on wall hangings, policies vary by property.
Conclusion: a clean gallery wall, no nails, no drama
A nail-free setup works when you treat it like a small project, not a quick hack: pick the right adhesive for the weight, plan the layout once, prep the wall, then give the adhesive time to bond. If you want one action to take today, mock your layout on the floor and weigh your frames, those two steps prevent most mistakes.
If you’re ready, choose one “anchor” frame, hang it perfectly level, then build outward with consistent spacing. That’s usually the moment the wall starts to look intentional.