How to organize craft ribbons and washi tape comes down to two things: seeing what you own at a glance, and putting each roll back in a “no-thinking” spot after you use it.
If your ribbon drawer turns into a knot pile and your washi tape migrates across your desk, you end up buying duplicates, avoiding projects, or spending your “craft time” hunting for the right color. That’s the frustrating part, and it’s also why a good setup feels like an instant upgrade.
This guide focuses on realistic systems for U.S. homes and small craft rooms, not picture-perfect pantry vibes. You’ll sort fast, choose storage that fits your space, and set a maintenance habit that keeps it from sliding back into chaos.
Key idea: ribbon and washi behave differently. Ribbon tangles and crushes, washi is small and easy to “over-collect,” so you’ll usually want slightly different storage rules even if they live side by side.
Start with a quick reset: purge, group, and measure
Before you buy bins, take 15–30 minutes to reset the stash. This step looks basic but it prevents the most common mistake: buying storage that doesn’t match your roll sizes or how you craft.
- Purge with purpose: toss truly damaged ribbon, keep “maybe” items in a small quarantine bag for 30 days.
- Group by use, not just color: gift wrap, scrapbooking, sewing, party decor, journaling.
- Separate odd shapes: jumbo spools, wired ribbon, mini washi, wide washi, sample rings.
- Measure your most common rolls: a quick tape measure check saves headaches when picking drawers or rods.
If you’re organizing for a household, consider a “shared vs. personal” split. Washi for kids’ crafts often needs a different home than your high-end ribbons or seasonal sets.
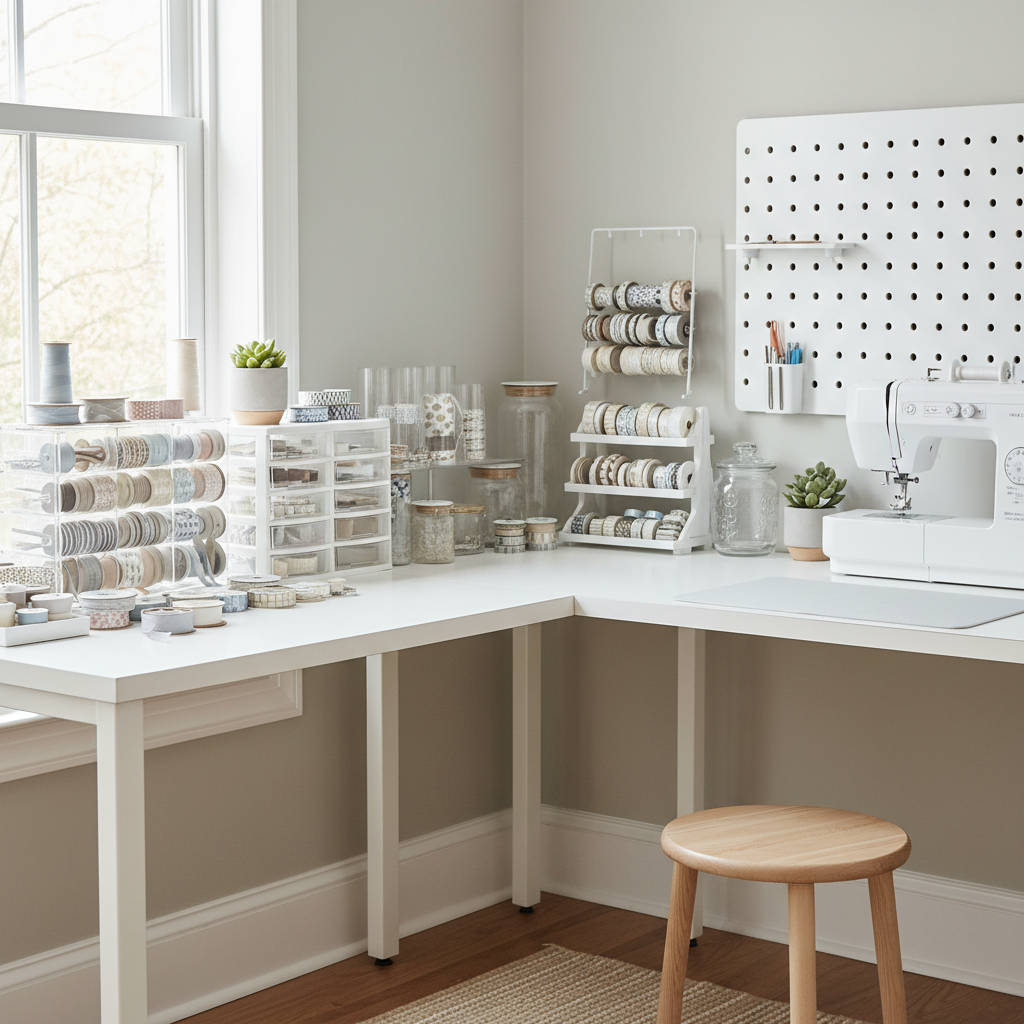
Choose the right organizing “style” for your space
Most systems fall into a few styles. Pick the one that matches your available space and how often you use these supplies.
| Storage style | Best for | Watch-outs |
|---|---|---|
| Clear drawers | Daily crafters who want quick access | Ribbons can “slump” without dividers |
| Wall-mounted pegboard/rods | Small rooms, visual people, frequent use | Dust, sunlight fading, looks busy if overfilled |
| Portable case or photo box | Travel, crops, crafting at the kitchen table | Easy to overpack, can hide duplicates |
| Closet shelf bins (labeled) | Seasonal ribbon and backup inventory | Out of sight means it needs better labeling |
| Ribbon spool dowel + washi tray | Mixed stash with lots of ribbon spools | Requires consistent roll sizes to look tidy |
According to U.S. Consumer Product Safety Commission, heavy items should be stored lower and shelving should be anchored when tip-over risk exists, especially if kids share the space. That’s worth keeping in mind if you’re tempted to stack tall drawer towers.
How to organize ribbon so it doesn’t tangle (or get crushed)
Ribbon problems are usually physical: loose ends, snagging, and spools that flop over. Solve those, and the rest gets easy.
Practical ribbon categories that hold up
- By function: gift wrap, hair bows, sewing/trim, wreaths/florals.
- By season: holiday, spring, wedding, everyday neutrals.
- By type: wired, satin, grosgrain, velvet, lace.
If you only pick one method, function usually wins. You reach for “gift wrap ribbon” faster than you remember “that coral satin.”
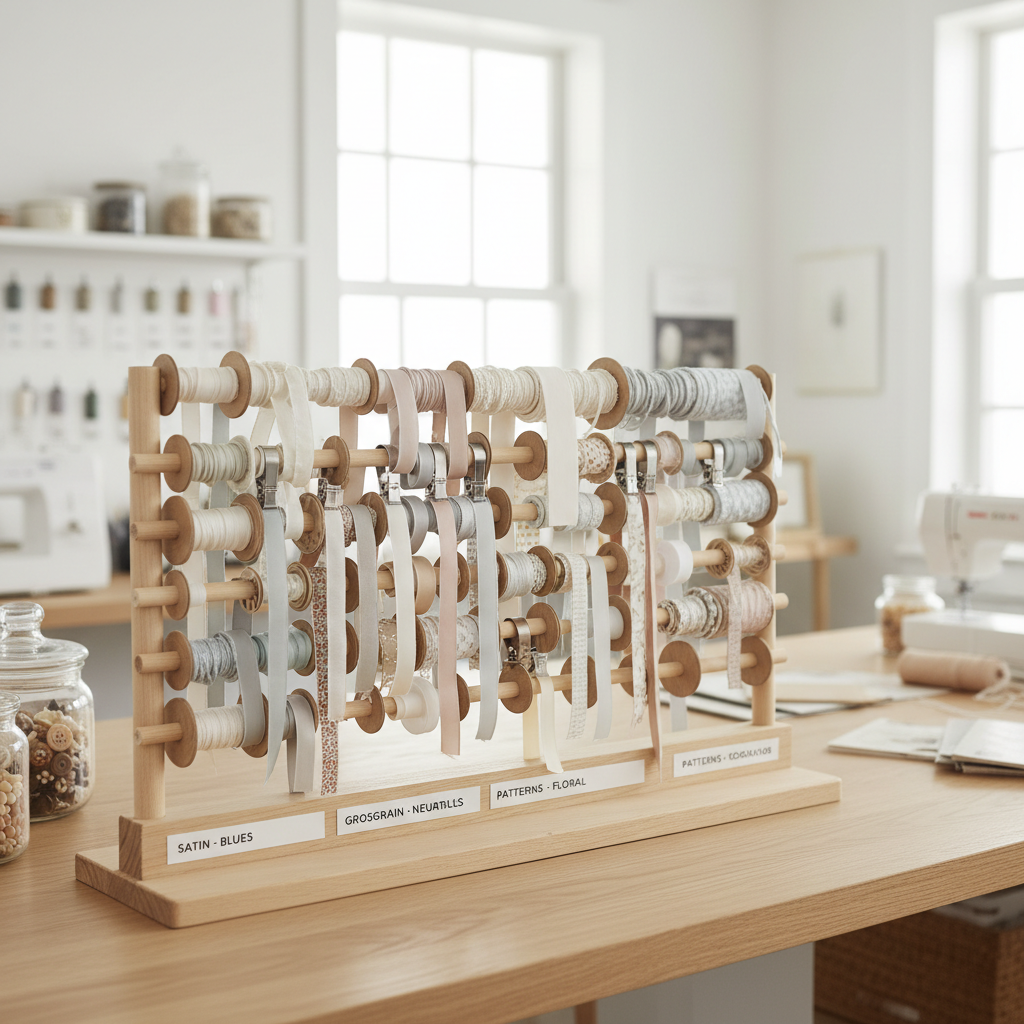
Methods that prevent tangles
- Secure the tail: use small binder clips, washi tabs, or silicone bands on each spool end.
- Keep spools upright: drawer dividers, tension rods, or a simple dowel system stops “roll drift.”
- Don’t overfill bins: crushed wired ribbon never really bounces back, especially on cheap spools.
- Separate loose ribbon lengths: store cut pieces on a ring (tagged by width) or in a labeled envelope.
One underrated trick: if you have multiple spools of the same ribbon, keep only one in the “active” area and store backups elsewhere. That single decision reduces clutter more than most fancy organizers.
How to organize washi tape so you can actually find what you have
Washi tape is small, collectible, and easy to duplicate. The best systems make patterns visible and limit overflow.
Simple washi categories that make sense in real life
- By theme: florals, grids, holidays, travel, kids, minimal.
- By color family: warms, cools, neutrals, rainbow sets.
- By width: skinny, standard, wide, extra-wide.
Theme tends to feel more natural for journaling and scrapbooking, while width is helpful if you use washi for borders or packaging.
Storage options that work well
- Shallow drawer inserts: rolls laid flat, easy to scan, hard to overstack.
- Tiered acrylic risers: makes patterns visible, good for desktop use.
- Photo cases: great if you craft away from your main space, label the spine.
- Washi on rings (sample cards): best for “too many to store” situations, but you lose original roll feel.
When people ask how to organize craft ribbons and washi tape together, this is the common compromise: ribbons get structure (rods/dividers), washi gets visibility (trays/risers). Trying to store both the exact same way usually leads to either tangled ribbon or hidden washi.
A quick self-check: what system should you use?
If you’re stuck, use this quick checklist to choose a direction without overthinking.
- You craft 3+ times per week: prioritize visibility and speed (clear drawers, desktop trays).
- You craft occasionally, big seasonal bursts: prioritize labeling and containment (lidded bins, shelf boxes).
- Your space is shared (kids/kitchen table): prioritize portability (handled caddies, cases).
- You buy often and forget what you own: prioritize inventory cues (swatch cards, “one in/one out” rule).
- You hate decanting: avoid sample rings as your main solution, stick to roll-based storage.
Be honest about your habits. A “pretty” system that requires constant decanting is the one that quietly fails after two busy weeks.
Step-by-step setup (90 minutes, no special tools)
This is a solid, repeatable process for how to organize craft ribbons and washi tape without turning it into a weekend-long project.
1) Create two zones: Active and Archive
- Active: what you use in the next 30–60 days, keep within arm’s reach.
- Archive: seasonal, backups, “maybe” supplies, store higher or farther away.
2) Assign containers by behavior
- Ribbon: rods, dividers, or upright slots so spools stay put.
- Washi: shallow, open-top visibility so you can scan patterns fast.
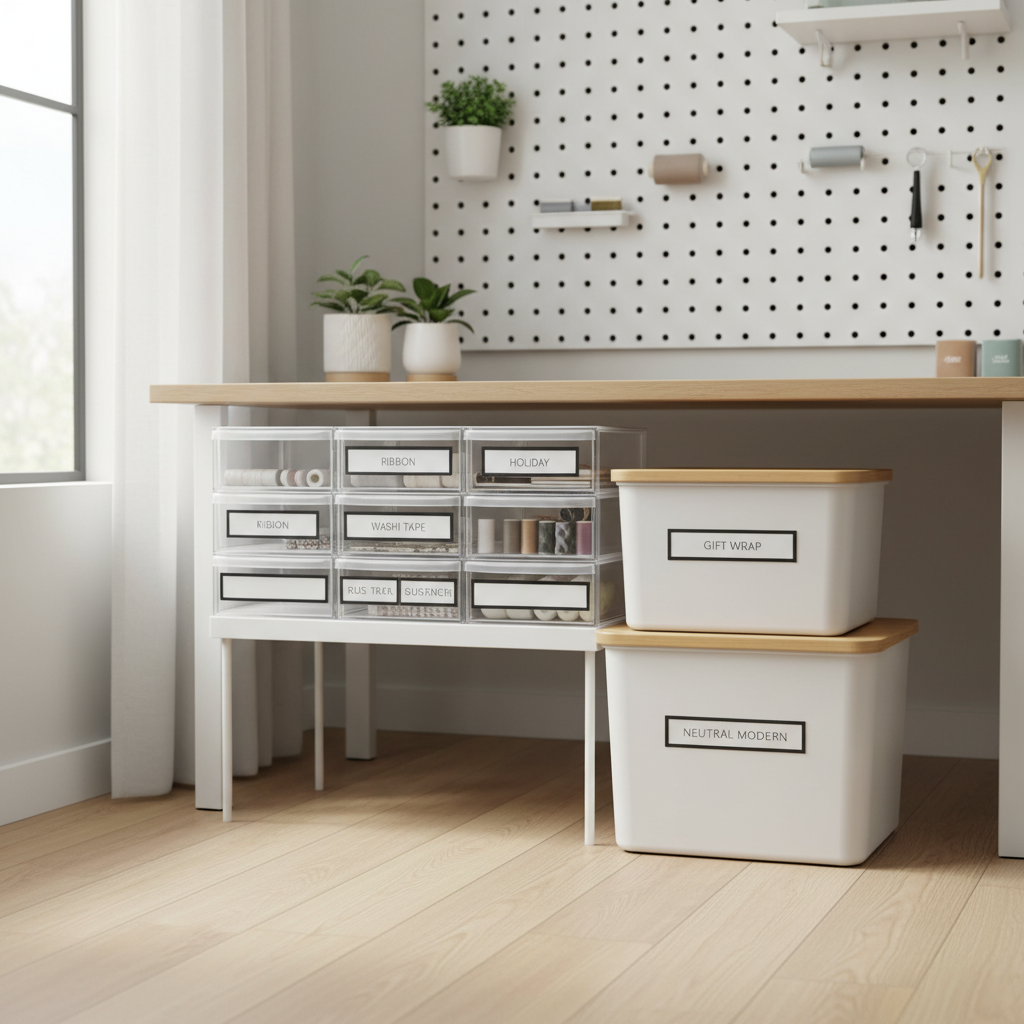
3) Label like you mean it
- Use category labels, not micro-labels for every shade.
- Put labels where you naturally look: bin front, drawer edge, or lid top.
- If you share the space, add a small “return here” label inside the drawer.
4) Add one maintenance rule
- One-touch reset: after a project, every roll goes back before you start something else.
- Monthly 10-minute scan: move “not used” items to Archive, bring seasonal items forward.
That maintenance piece is the difference between “organized once” and “organized for good enough.”
Common mistakes (and what to do instead)
- Mistake: storing ribbon loose in a big bin. Do instead: keep it on spools, secure tails, add dividers.
- Mistake: stacking washi in deep drawers where you only see the top layer. Do instead: use shallow trays or a tiered insert.
- Mistake: organizing by “perfect” rainbow order. Do instead: organize by how you shop and craft, then color within categories if you enjoy it.
- Mistake: buying organizers before purging. Do instead: size storage to what you keep, not what you might collect later.
- Mistake: ignoring sunlight and heat near windows. Do instead: store favorites out of direct sun to reduce fading risk over time.
Conclusion: keep it visible, keep it returnable
If you want how to organize craft ribbons and washi tape to stick, aim for a setup where you can spot options fast and put everything away without a decision spiral. Get ribbon stable, get washi visible, and give yourself an Active zone that matches real life.
Action to take today: pick one drawer, create “Active vs. Archive,” then label just 5–8 categories you actually reach for. Your next project will feel noticeably smoother.
FAQ
What is the easiest way to store ribbon without tangling?
Keep ribbon on spools, secure the tail with a small clip or band, and store spools upright or on a dowel so they can’t slide and unwind in a pile.
How do I organize washi tape if I have too many rolls?
Use shallow storage so you can see most rolls at once, then move duplicates and seasonal themes into an Archive box. If overflow keeps happening, sample cards can help you keep patterns without keeping every roll within reach.
Should I organize by color or by theme?
Theme usually works better for journaling and scrapbooking because you think in motifs, not hex codes. Color can work if you craft for events where matching matters, like weddings or gift wrapping.
How can I organize craft ribbons and washi tape in a small apartment?
Look for vertical and portable options: a slim drawer unit, a handled case, or a pegboard section. Keeping an “active caddy” you can put away quickly often beats a big permanent station.
What labels should I use so my system stays easy?
Use broad labels you won’t argue with later, like “Gift Wrap,” “Holidays,” “Florals,” “Neutrals,” and “Kids.” Overly specific labels tend to create a messy “where does this belong” moment.
How often should I reorganize my ribbon and washi tape?
Most people do well with a quick monthly scan and a seasonal swap. Full reorganizations usually mean the system is too complicated or the storage isn’t visible enough.
Is it okay to store ribbon and washi tape together?
Yes, if each gets what it needs: ribbon should be constrained so it doesn’t unravel, while washi should be displayed shallowly so you can see patterns. A shared drawer unit with different inserts can work well.
If you’re staring at a pile and want a more “set it up once” approach, start by choosing one storage style you can maintain, then build a small Active zone that fits your craft routine, it’s usually the most painless way to get organized without buying a ton of new bins.