How to organize office supplies desk usually comes down to one thing, deciding what truly deserves prime real estate within arm’s reach, and what can live a little farther away.
If your desk keeps “re-cluttering,” it’s rarely because you lack organizers, it’s because the system doesn’t match how you work, where you reach, what you use daily, and what piles up when you’re busy.
This guide gives you a practical setup you can copy, a quick self-check to diagnose what’s breaking your flow, and a few low-drama habits that keep the surface clear without turning you into a minimalist.
Start with a 5-minute desk reset (no decisions yet)
The fastest way to organize without overthinking is to reset the surface first, then decide placement with a clear view.
- Clear the top: move everything into a box, tote, or a “temporary pile” on the floor.
- Wipe the desk: crumbs and dust make clutter feel worse than it is.
- Bring back only work tools: mugs, random gadgets, and old mail can wait.
Many people skip this and try to “organize around the mess,” which usually locks the old layout in place.
Why desks get messy again (the real reasons)
Before buying anything, it helps to be honest about why the clutter returns. Most desks fail for a handful of predictable reasons.
- No home for small items: clips, sticky notes, and USB drives migrate into little piles.
- Paper becomes a default storage: documents, receipts, and packages land on the nearest flat spot.
- “One-day” items stay for weeks: returns, forms to sign, and warranty cards become permanent residents.
- Too many backups: three staplers and five pens feel safe, but they crowd your reach zone.
- Setup ignores your workflow: if you constantly stand up for a tool, you’ll stop putting it away.
According to OSHA, good housekeeping reduces slip, trip, and fall hazards in workplaces, and while a desk isn’t a warehouse aisle, the same principle applies: fewer loose items in active areas means fewer “oops” moments and less distraction.
Quick self-check: what kind of desk clutter do you have?
Different clutter needs different fixes. Use this checklist to spot your pattern in two minutes.
- Surface clutter: your desktop disappears under tools and paper by midday.
- Micro-clutter: small items scatter, you waste time searching for one adapter or one pen.
- Paper backlog: piles of “to file,” “to scan,” “to read,” “to sign.”
- Cable sprawl: chargers and cords occupy the space you want for work.
- Sentimental clutter: freebies, gifts, and “might need someday” items block practical storage.
If you checked more than two, that’s normal, but pick one primary to solve first or you’ll keep redoing the system.
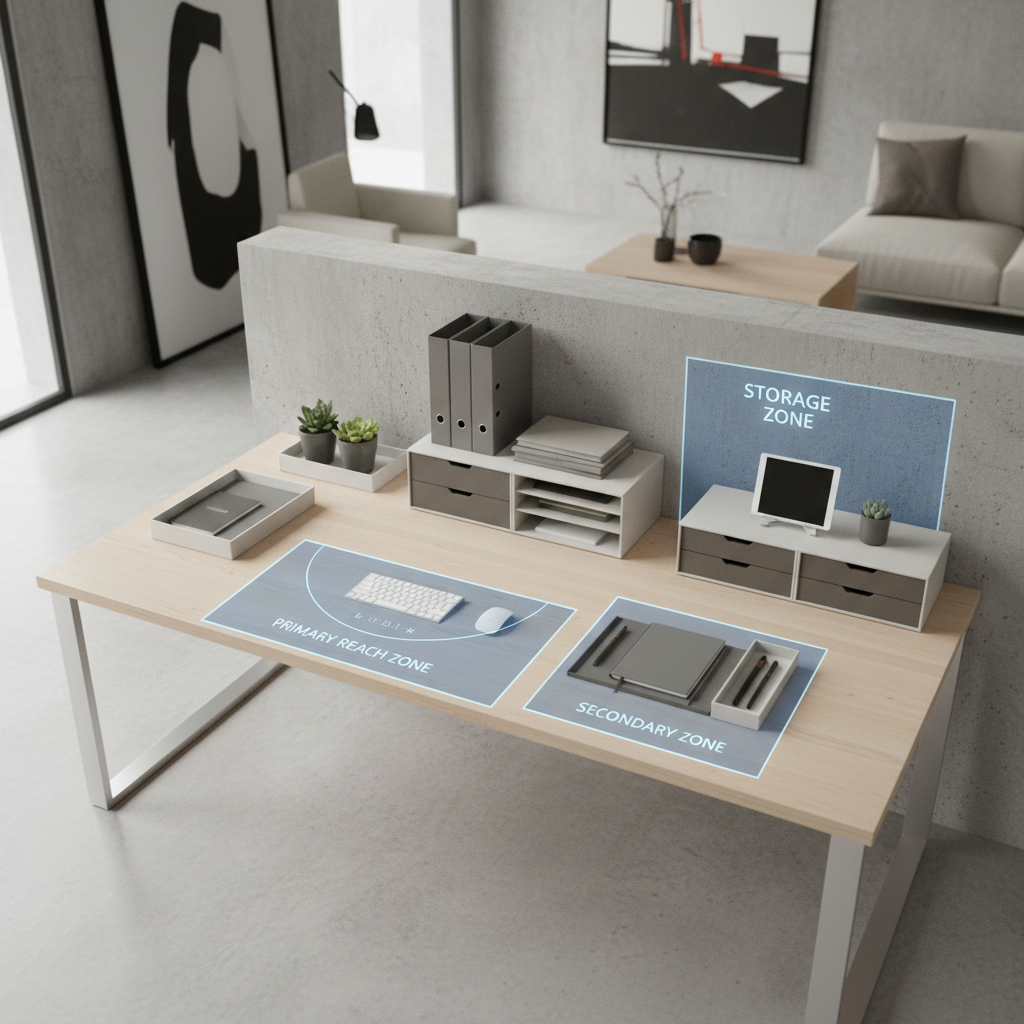
Build a desk layout that matches how you reach
When people ask how to organize office supplies desk without constant maintenance, the most reliable answer is zoning. Not fancy, just functional.
Zone 1: Primary reach (daily, hourly)
- 1–2 favorite pens
- One notepad or notebook
- Stapler or tape (whichever you use more)
- Sticky notes (one pad, not a stack)
Keep this zone small, think “keyboard area plus one hand span.”
Zone 2: Secondary reach (weekly)
- Highlighters, extra pen refills
- Paper clips, binder clips, thumbtacks in a small divided tray
- Charging cable you use often, ideally routed to the side
Zone 3: Off-desk storage (rare, backups)
- Extra supplies, bulk packs, spare notebooks
- Shipping supplies, labels, unused tech accessories
- Personal items you don’t need during work blocks
If you can’t store Zone 3 elsewhere, a lidded box under the desk is still better than open piles on the surface.
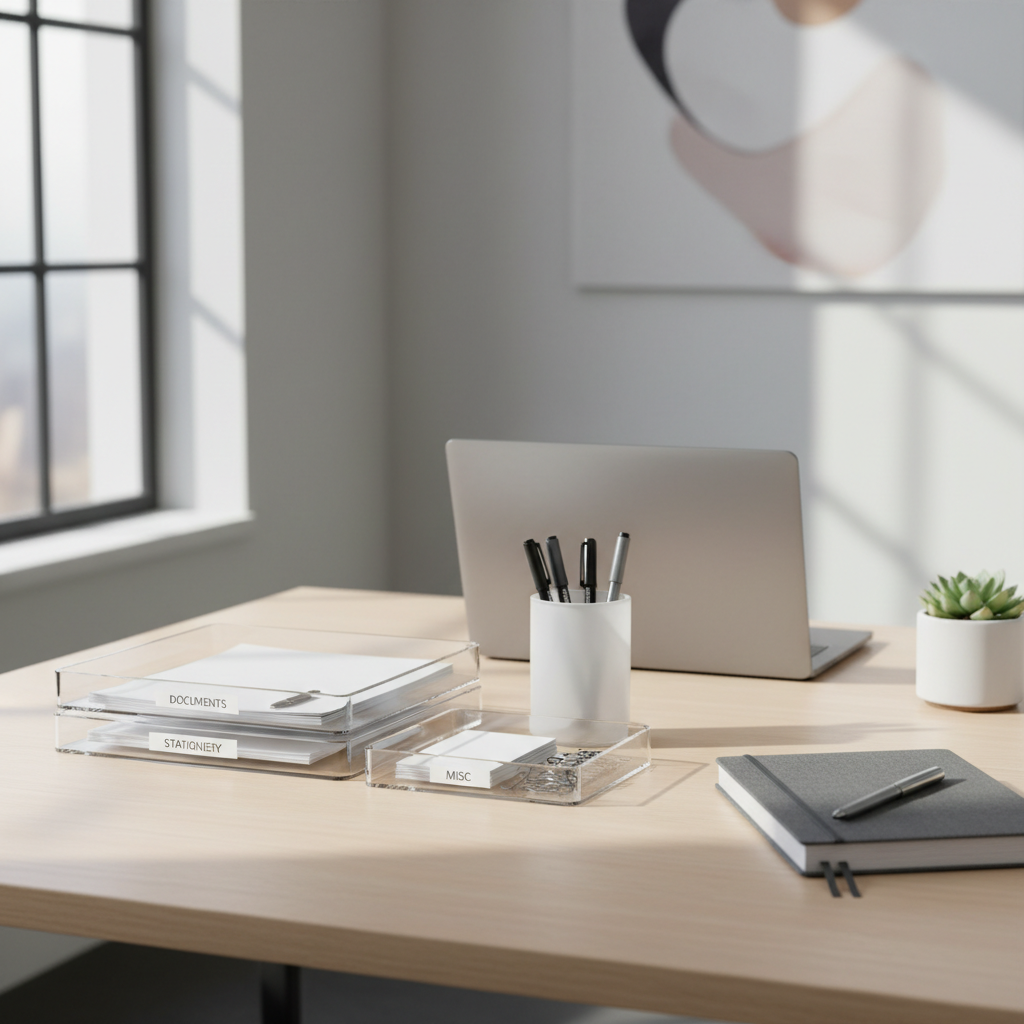
Choose organizers that solve a specific problem (not a shopping mood)
Organizers work when they reduce friction. They fail when they become “more stuff to manage.” Here’s a quick decision table you can actually use.
| Problem | What to use | What to avoid |
|---|---|---|
| Small items everywhere | Divided tray or small drawer inserts | One big open bin that becomes a junk bowl |
| Too many pens on the desk | Single pen cup + keep backups off-desk | Multiple cups that spread into every corner |
| Paper pile keeps growing | Two vertical letter trays: “In” and “Out” | Flat stacks that blend together |
| Cable sprawl | Cable clips + one charging spot | Loose cords crossing your work area |
| Desk feels cramped | Vertical organizers, under-monitor shelf | Wide trays that steal mousing space |
One practical rule, if an organizer forces you to do extra steps to put things away, you’ll stop using it. That’s not a discipline issue, it’s design.
Step-by-step: set up your desk in 30 minutes
Here’s a realistic setup flow that works for many home offices and corporate desks, without turning your workspace into a showroom.
- Step 1: Place your “work core” first, laptop/monitor, keyboard, mouse, writing space.
- Step 2: Add Zone 1 items only, then stop and test reach for 10 seconds.
- Step 3: Put small items into one divided tray or one top drawer insert.
- Step 4: Create a simple paper pipeline: In, Action, Archive. If you hate filing, “Archive” can be one folder you review monthly.
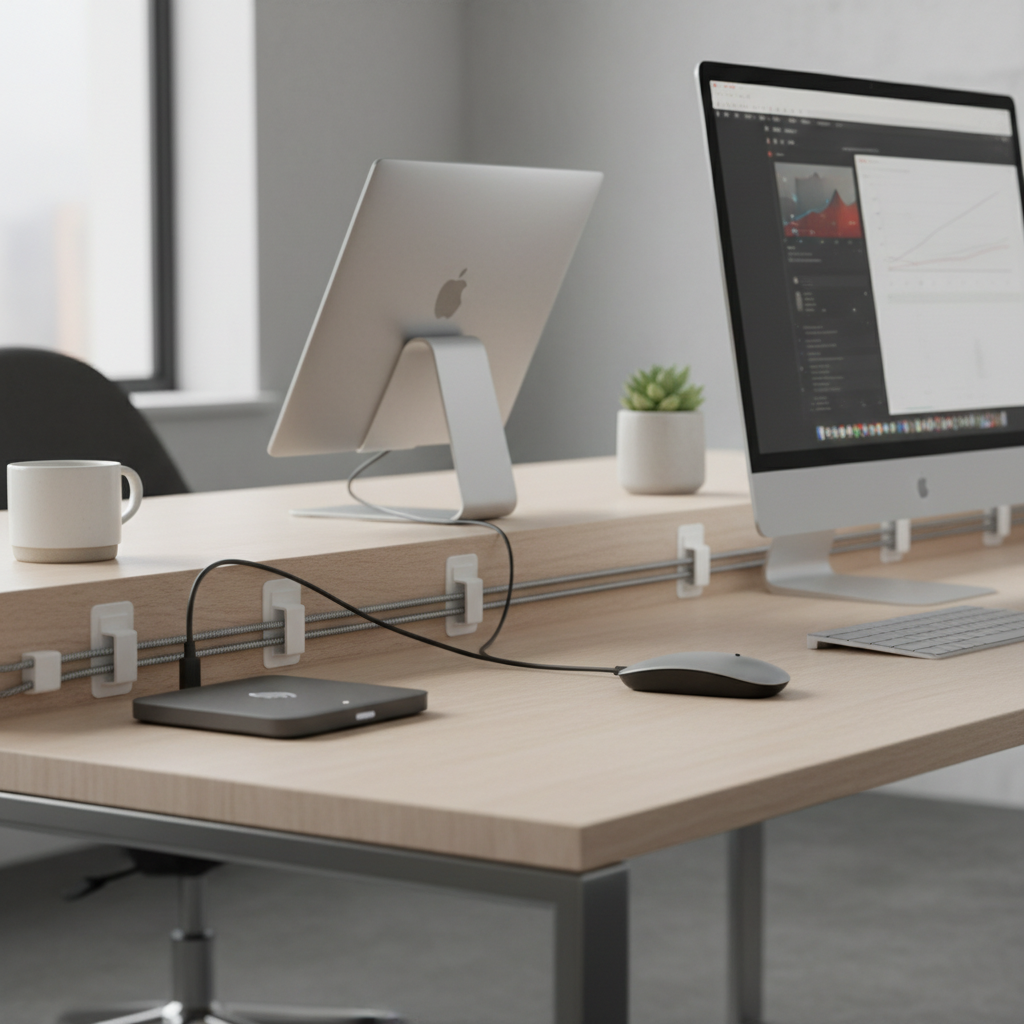
- Step 5: Pick one charging location, route cables along the edge with clips, keep one spare cable in a drawer.
- Step 6: Decide what leaves the desk entirely, duplicates, old stationery, packaging, mystery cords.
When you’re done, take a quick photo. It sounds silly, but a reference image makes resets easier on messy days.
Keep it organized with a tiny maintenance routine
Most people don’t need a weekly “desk overhaul,” they need a reset small enough that it doesn’t trigger resistance.
- Daily (2 minutes): return Zone 1 items to their spots, clear cups and trash, stack paper into the right tray.
- Weekly (10 minutes): empty the divided tray “crumbs,” toss dead pens, review the “Action” pile.
- Monthly (20 minutes): reduce backups, move archived paper off-desk, wipe organizers and cable area.
If your job is paper-heavy, the routine still works, you just run the weekly step more often, and keep the paper pipeline visible.
Common mistakes that waste time (and what to do instead)
- Buying organizers before sorting: you end up storing clutter more efficiently, not reducing it.
- Keeping “maybe” items on the surface: create a small “decide later” box off the desk, review it on a schedule.
- Over-labeling everything: labels help in shared spaces, but in a personal desk, consistent placement usually beats label maintenance.
- Letting paper float: paper needs a hard rule, either it enters the tray system or it leaves the desk.
And a quieter one, expecting your desk to look perfect all day. In real work, it won’t. The goal is a desk that resets quickly.
When it makes sense to get extra help or adjustments
If your desk setup causes recurring wrist, shoulder, or neck discomfort, the issue might not be supplies at all, it might be ergonomics and work habits. According to NIOSH, ergonomic practices can reduce musculoskeletal risk in many workplaces; if pain persists, it’s smart to talk with an ergonomics specialist or a healthcare professional for personalized guidance.
If clutter ties to stress, attention challenges, or executive function issues, a professional organizer or therapist may help you build a system that fits how you think, not how a photo looks.
Key takeaways you can use today
- Zoning beats buying: daily tools stay close, backups move away.
- Paper needs a pipeline: “In,” “Action,” “Archive” keeps it from becoming furniture.
- One home per item: especially for small tools, otherwise micro-clutter wins.
- Maintain with tiny resets: a 2-minute routine prevents weekend cleanups.
Pick one change you can finish in under 10 minutes today, a divided tray, an “In/Action” paper setup, or moving backups off the desk, and you’ll feel the difference fast.
FAQ
What are the best office supplies to keep on your desk every day?
Keep only what you touch most days: one or two pens, a notebook, and one fast tool like tape or a stapler. Everything else can stay in a drawer or a nearby container so your work area stays usable.
How do I organize office supplies on a small desk without drawers?
Go vertical and limit duplicates. A slim pen cup, a small divided tray, and a vertical paper sorter can replace drawer storage, then push backups into a lidded box under the desk or on a shelf.
How can I stop paper from piling up on my desk?
Give paper only two outcomes: it goes into a tray you review on a schedule, or it leaves the desk. A simple “In” and “Action” tray often works better than complicated filing if you’re busy.
How often should I declutter my desk?
A quick daily reset keeps chaos from compounding, then a weekly 10-minute review handles the slow creep. If your role is document-heavy, you might do the weekly review twice a week.
Is it okay to keep extra pens and supplies on the desktop?
Some people like visual access, but in many cases extra supplies turn into visual noise and friction. A good compromise is one visible container with strict limits, and everything else stored off-desk.
What’s a simple way to manage charging cables on the desk?
Create a single charging spot and route cords along the edge with clips, so cables don’t drift into your working area. Keep one spare cable in a drawer rather than leaving multiple cords out.
How do I organize office supplies desk setups for shared workspaces?
Shared desks usually need clearer boundaries: one small caddy for personal tools, labeled trays for paper handoffs, and a quick end-of-day reset so the next person starts clean. Keep the system obvious and low-maintenance.
If you’re organizing a shared office, a home office corner, or a hybrid setup where your desk changes day to day, it may help to build a simple “desk kit” and a repeatable zoning layout, so you can reset fast even when your schedule gets messy.